Tuesday, June 12, 2012

How I store my handmade cards

Hi everyone

I am posting this at almost midnight.

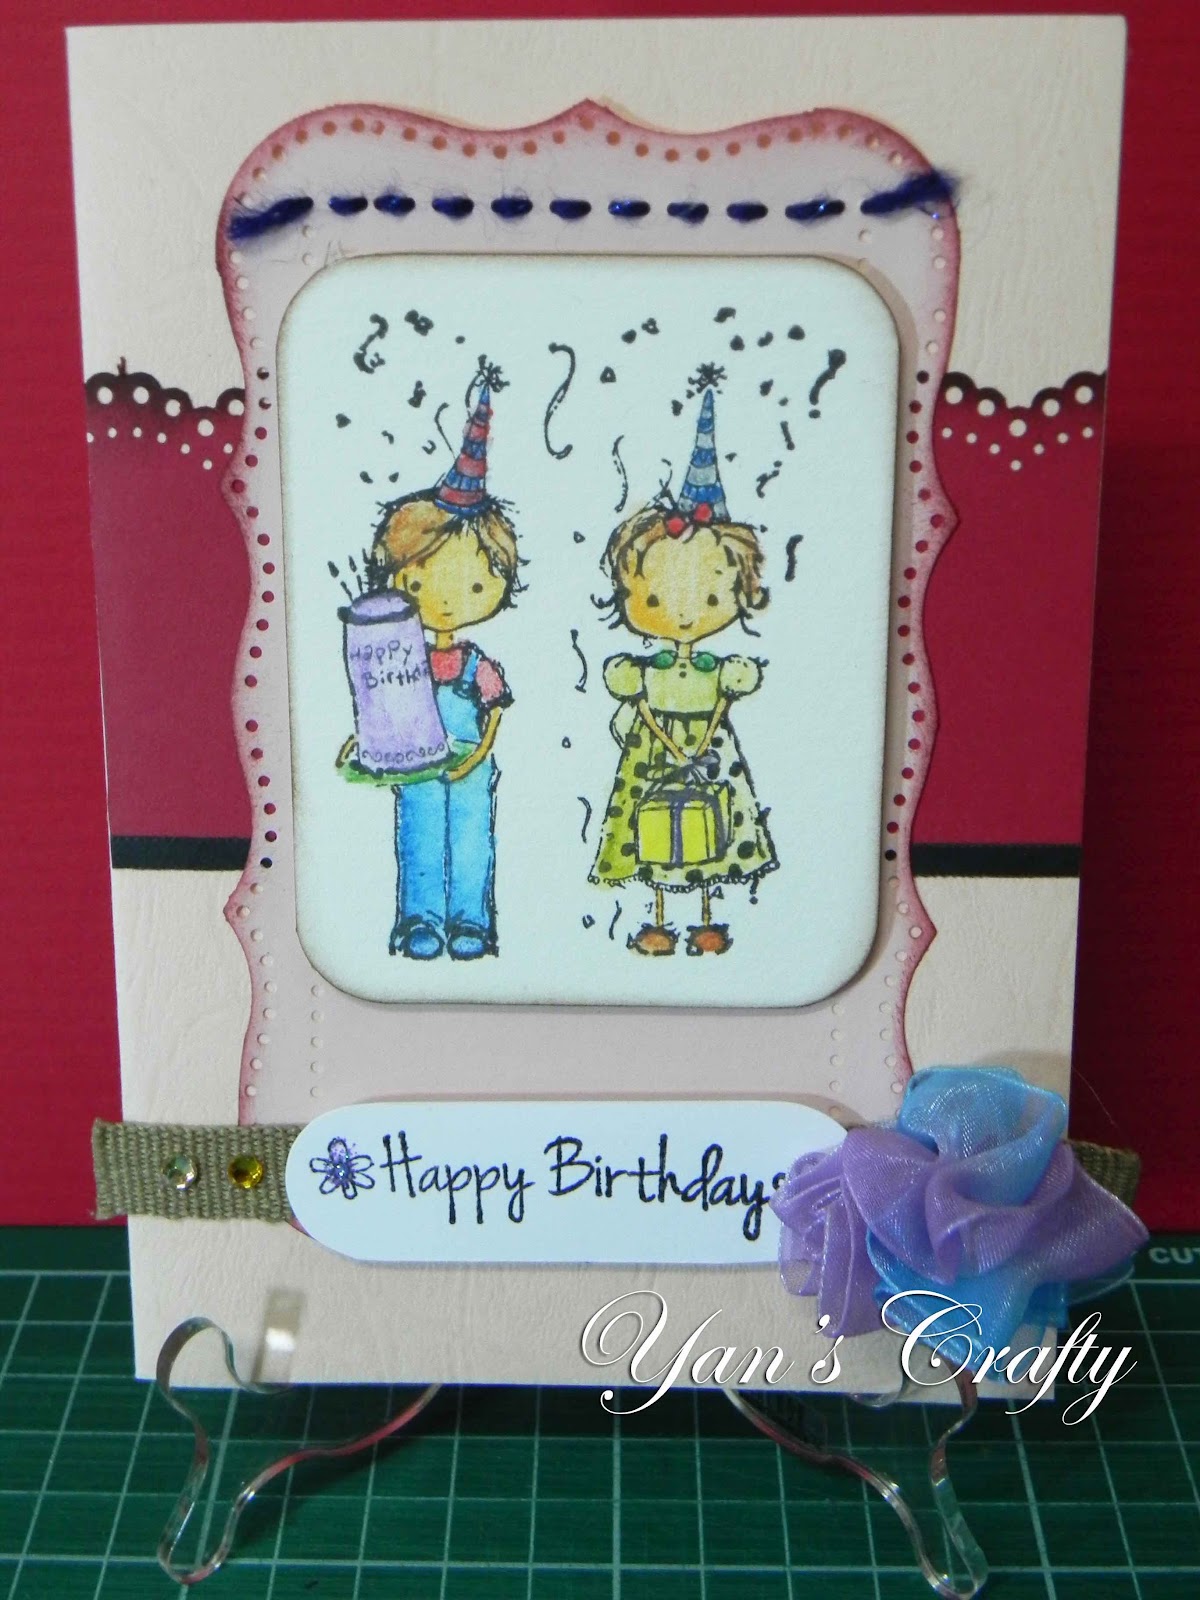
I just wanted to share what I have done so far in preparing the handmade market for the event of Georgetown Festival (GTF).

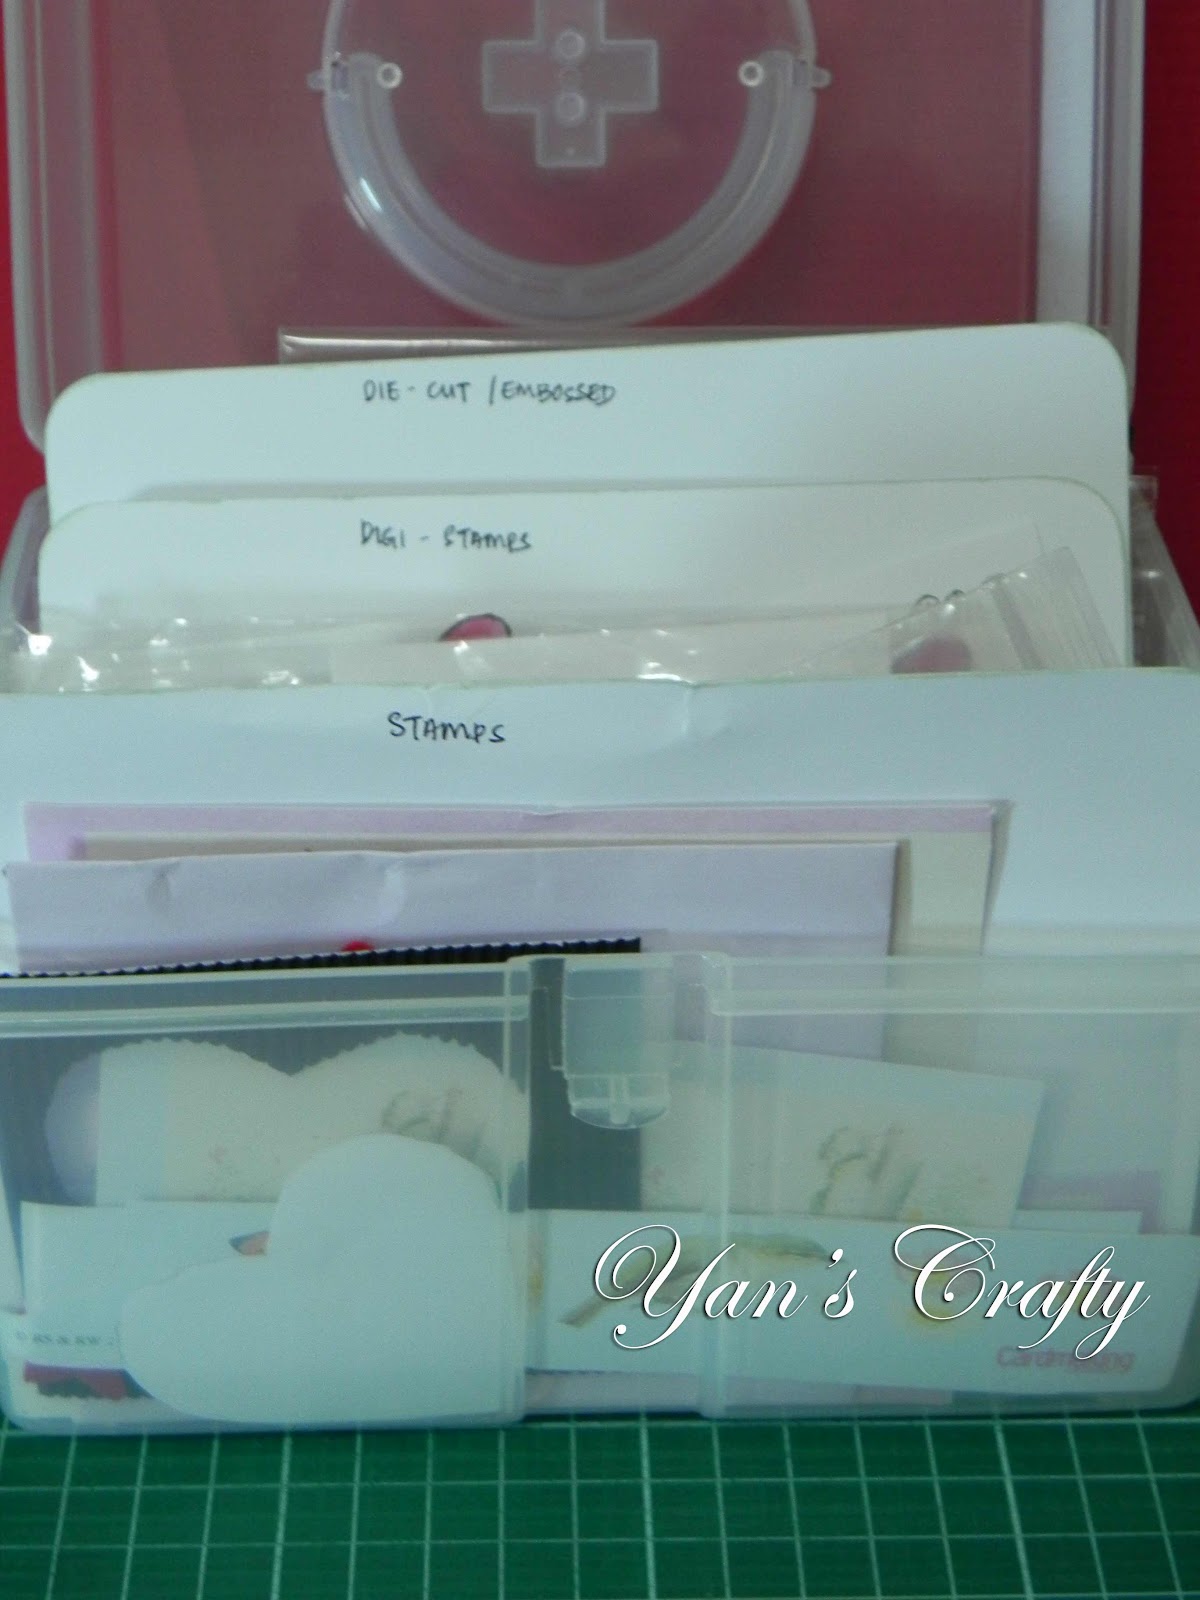
One of it - storing my handmade cards.

I used a storage box to store all my handmade cards. (Just nice to fit everything in)
These dividers I have done earlier since my last participation at flea market / bazaar. Now, I used as a box divider.

See the green tag??? It is for Christmas ~~~

I made some nice packaging & of course, if you go to Kraftee Bee, you will see them. It is the same packaging which I placed my handmade cards at Kraftee Bee, Viva Home, Cheras, KL.

What is good about this storage system? Basically, this storage box have 2 usages, i.e. one for me to store my cards & another one is for my flea market / bazaar preparation. It is as easy as 1-2-3 & hassle free.


So..... remember to visit us at GTF on 23 Jun 2012. Please help to spread some words about GTF.

Thank you.


Wednesday, June 6, 2012

Handmade Market @ Armenian Street, Georgetown, Penang (23 Jun 2012)

Yup, this is the announcement that I wanted to announce earlier.


Yan's Crafty is going to participate handmade market in this 23rd Jun 2012.

Where? Yap Kongsi Temple Hall, Armenian Street, Georgetown, Penang
Date? 23rd Jun 2012
Time? 5p.m. to 10 p.m.

Do come & visit to see the local crafter's hand crafted stuffs. Get to know them more.


Lastly, do spread a words of it.

Thank you.

Tuesday, June 5, 2012

Storage for Colored / Cutted Image Stamps & Die-cuts

Having difficulty to store all your colored stamps / digi-stamps? Die-cut images? or decoupage images?

The colored stamps can be store in a zipped plastic bags or even plastic bags to separate it.

What you will need also is a paper (recommended 160gsm & above) to become your divider. Yes, you may decorate your divider if the container does not have cover. As for myself, I go for simple design. Just cut & write the separator accordingly.


Ta da..... my very simple box organizer. Cheap, economical & easy.


Have fun.

Storage Idea for Papers


Hi everyone

How times flies… Now it is month of June & I am counting down the day for my next handmade market in this month. Guess where will I be this round? Wait for my announcement ya!

Okay, today I would like to share about storing papers. Previously, I have been storing the papers in brown paper envelope or even plastic bags where I bought my papers (which came in a pack) from the stationery shop. I have been wishing to get nice shelves but not manage to get one because I have small space.

What I did was......

1. I bought few "U" shape plastic folders (it can be A4 / F4 size... depends which one you prefer)


 2. Print labels (I used stickers) to label all the plastic folders.


 3. Store all the papers accordingly.


4. I bought 1 magazine rack to store my plastic folders. 


Cheap & economical way to store your paper right? and much organized too..

Have fun!

Friday, June 1, 2012

Sketch 167 (Card Patterns) & June's Colour Combo Challenge (Daring Cardmakers)

Today I made another card to enter challenges organized by Card Patterns & Daring Cardmakers.
In addition, I made this card specially for one of my friend who's birthday fall in the month of June. I hope she will love it.


In Sketch 167 by Card Patterns, they have provided the sketch layout as below.


Meanwhile in June's Colour Combo Challenge by Daring Cardmakers, they have provided the colour combination of Red, White, and Blue - to celebrate the Queen's Diamond Jubilee.


Here is my card design to enter both of the challenges.


I added string of thread into the holes & stamped image was colored with Luna Aquarrel watercolour pencil.


Here is the nearer view of the thread. It is thick with some shiny thread in it. I bought this yarn of thread from eCo-cent$. It is real cheap & grabbed a lot of other threads (limited stocks).


In this Happy Birthday sentiments, the words are heat embossed. It is hardly to see the embossed word here. I added a little bit of color from Sharpie permanent marker. A dot of glitter on it.


Nearer view of my ribbon scrap & rhinestone sticker. The ribbon scraps was actually taken from a spoilt paper bag.


This is one of my favorite. DIY the ruffle ribbon by myself. I pulled the thread & make it like a flower. Twist a little bit here and there & stitched on the brown ribbon.


Card recipe:
1. Papers & card stock from local stationery shop.
2. Paper punches using MS Doily Lace & Cherish.
3. Embellishment – rhinestone sticker, scraps (ribbons & strings).
4. Distress ink from Ranger distress ink - Walnut stain & Aged Mahogany.
5. Clear stamp:
     a. Sentiments (Happy Birthday) designed by Adam Pescott.
     b. Birthday from Prima.
6. Glitter glue on the stamped flower.

Thank you for visiting my humble blog.


Tutorial: Create Your Own Pearlized Flourishes

Despite of blogging about how & what I have created, let's see what other crafter have done.

Basically, I learned from many sources - books, mags, Youtube, Blogger (crafter's blog), etc. Or even, I attend classes.

I have been always fond with those half pearl (in swirl movement) used in scrap booking which added as an embellishment.

-------------------------------------------------------------------------------------------
Create Your Own Pearlized Flourishes
(extracted from http://www.mixedmediaart.net/mixed-media-art-techniques/create-your-own-pearlized-flourishes)

This article is written by Dawn Stegall of FaithfullyYours.net

From crystals, to pearls to rhinestones and beyond, bling is hot in scrapbooking and mixed media art! However, bling can be expensive. In this tutorial, you will learn how to make your own pearlized flourishes for much less. Not only are these less expensive, but quick and easy to create as well as easily customizable.

Supply list:
• Bling flourish (you want to copy)
• Pearl paint (Ranger’s liquid pearls, Tulips pearl fabric paint)
• Transparency
• Scanner/copier

dawn stegall

Step 1: Scan/Copy Original Flourish
This step may require some experimenting on your part to get the desired result. I started out scanning with flourish still attached to original backing. Finally, I ended up copying and printing in one step.
dawn stegall
Step 2: Place transparency on top of copied image.
Step 3: Begin Painting
Add dots of paint following copy as your guide. Keep paint bottle straight up for better “beads” of paint.
Continue adding paint.
This copy has multiple flourishes. You can copy “as is” or only use the ones you want.
Once you have finished making all your beads, let dry.
Step 4: Trim Around Flourish
The clear transparency will be barely visible on your finished project.
Finished card using handmade pearl flourish.

The flourish didn’t quite fit my card placement, so I cut it apart and placed around the sentiment how I wanted.


A few ideas:
• You can use any type of flourish or pattern. Just follow along lines, making dots of paint.
• Stamps-I have also seen rubber stamps of “dotted” flourishes.  Stamp with watermark ink or a light ink and cover each stamped dot with a dot of paint.
• Find a digital image online you can print out and use for your pattern.
Think outside the box!  You can use any shape, pattern or design you want. Simply follow along the design placing spaced dots of paint. Good luck and fun!


----------------------------------------------------------------------------------------

Economy right?
Based on some articles I have read previously, you can use the Liquid Pearl & Dimensional Fabric Paint as long it gives you the texture that you want.


Have fun!

p/s: I will show you when I did mine. ^_^

Altered Plastic Paper Clip

TGIF!

Happy Friday!

I have been spending 4 days at home doing my hand crafts stuffs - hand embroidery, wired jewelry, beadings & paper crafts. Took annual leaves from the co.


Today, I am going to share what I have done with plastic paper clips.

These are paper clips which I get for FREE from my last year purchase at Living Cabin & was kept in my storage approx. a year. They are cute with nice cute animals on it.


Do you know that you can re-purpose your earring which do not have earstud? Saw my earring without earstud as below? ( O_O yeah.. saw it.. Hahaha )


In addition, I also used paper flowers from Kaiser & Prima to decorate my paper clip. I arranged the flower on top of the paper clip. Of course, using UHU glue to stick it on.


I used buttons & ribbons to add in more decoration. Aren't they lovely? ^_^
If you look at the top row, these pink flower was actually one of my scraps too. It come from one of my hair band & it always keep dropping out. So, I pulled everything & keep it as scraps.


 Have fun with this project if you have these type or any type of paper clips.

Tips: You can use the earrings (without earstud) on your cards or scrap booking to add in as embellishment.